
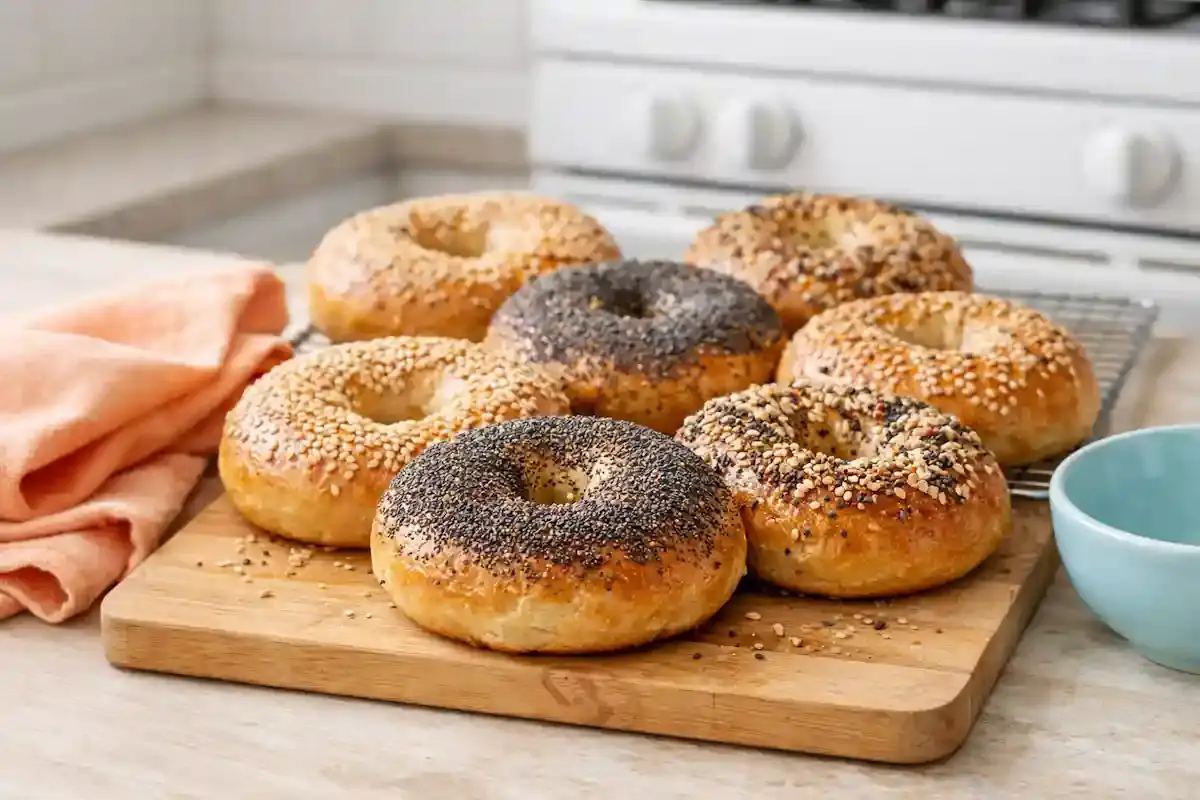
This bagel recipe makes classic homemade bagels with a chewy interior, a lightly crisp crust, and a deep golden finish. The key steps are using bread flour or high-gluten flour, shaping the dough firmly, boiling the bagels before baking, and baking them hot until evenly browned.
Key Takeaways
- Bread flour gives homemade bagels a strong, chewy texture, while high-gluten flour creates an even more traditional bagel bite.
- Boiling before baking helps form the shiny crust and dense structure that make bagels different from regular bread rolls.
- A short boil gives a slightly softer bagel, while a longer boil creates a chewier result.
- Simple toppings like sesame seeds, poppy seeds, everything seasoning, or dried onion add flavor and texture without changing the base recipe.
- Proper storage and make-ahead steps help keep homemade bagels practical for breakfast or meal prep.
Introduction
If you want homemade bagels that are chewy, golden, and closer to bakery-style results, the method matters as much as the ingredients. This bagel recipe walks through the full process, including the best flour for bagels, why boiling matters, how long to boil for the texture you want, topping ideas, and simple tips for shaping, baking, storing, and making them ahead.
This recipe focuses on simple technique, clear shaping, and boil-and-bake cues that help homemade bagels turn out chewy and well structured.
Update note: This article was updated with clearer instructions, improved flour and boiling guidance, and more practical tips for making chewy homemade bagels.
Why This Bagel Recipe Works
This bagel recipe works because it uses the core techniques that give bagels their classic texture instead of treating them like standard bread rolls. Bread flour or high-gluten flour helps build the strong gluten structure needed for a chewy bite, while the relatively firm dough helps the bagels hold their shape and bake up dense rather than fluffy.
Boiling the shaped bagels before baking is another key part of the method. That quick boil helps set the outer layer of the dough, which is what creates the shiny crust and the distinctive chew bagels are known for. It also gives you some control over the final texture: a shorter boil leads to a slightly softer result, while a longer boil gives the bagels more chew.
This recipe also stays practical for a home kitchen. The ingredient list is simple, the steps are clear, and the method covers the details that matter most for success, including flour choice, shaping, boiling, toppings, and storage. That keeps the recipe approachable while still aiming for classic homemade, bakery-style bagels rather than a softer bread-style version.
What Is a Bagel?
A bagel is a ring-shaped yeast bread that is boiled before baking. That boil helps create its shiny crust, dense crumb, and chewy texture, which make bagels different from softer bread rolls or standard homemade bread.
Ingredients You Need
This recipe uses simple pantry ingredients, but each one plays an important role in the final texture and flavor. The combination creates bagels that are firm, chewy, and well browned after boiling and baking.
- Active dry yeast helps the dough rise and gives the bagels a lighter interior without making them fluffy.
- Granulated sugar lightly sweetens the dough and helps activate the yeast.
- Warm water hydrates the dough and helps bring the yeast to life.
- Bread flour or high-gluten flour gives bagels their structure and signature chew.
- Salt strengthens flavor and supports dough balance.
- Optional toppings like sesame seeds, poppy seeds, everything seasoning, or dried onion add texture and variety.
Ingredient List
- 2 teaspoons (6 g) active dry yeast
- 4 ½ teaspoons (19 g) granulated sugar
- 1 ¼ cups (300 ml) warm water, plus up to ¼ cup (60 ml) more if needed
- 3 ½ cups (440 g) bread flour or high-gluten flour, plus up to ½ cup (60 g) for kneading
- 1 ½ teaspoons (6 g) salt
- Optional toppings: sesame seeds, poppy seeds, everything seasoning, dried onion flakes
A firm dough is expected here. Unlike many softer bread recipes, bagel dough should feel sturdy rather than loose. That lower hydration is one reason bagels keep their shape well and bake into a denser, chewier result.
What Flour Works Best for Bagels?
Bread flour is the best choice for most homemade bagels because its higher protein content helps create a chewy texture and stronger structure. If you want a firmer, more classic bagel bite, high-gluten flour can take the texture a step further.
All-purpose flour can still work, but the result is usually softer and less chewy. For a bagel that feels closer to a bread roll than a classic deli-style bagel, all-purpose flour is the more likely outcome.
| Flour Type | Protein Strength | Texture Result | Best Use |
|---|---|---|---|
| Bread flour | High | Chewy texture with strong structure | Best all-around option for homemade bagels |
| High-gluten flour | Very high | Firmer texture and more traditional chew | Best for a more classic bagel bite |
| All-purpose flour | Moderate | Softer, lighter result | Works in a pinch, but less traditional |
If you want the simplest reliable option, use bread flour. If you want a denser, chewier result, use high-gluten flour. If all-purpose flour is all you have, the bagels can still work, but the texture will be less classic.
Quick Summary: Ingredients, Time, and Yield
This homemade bagel recipe uses a short ingredient list and a simple boil-and-bake method to create classic bagels with a chewy interior and a golden crust. It is a practical recipe for breakfast, brunch, or make-ahead baking.
- Yield: 8 bagels
- Prep time: 20 minutes
- Rise time: 1 hour
- Cook time: 20 to 25 minutes
- Total time: About 1 hour 45 minutes
- Texture: Chewy inside with a lightly crisp crust
- Main method: Mix, knead, rise, shape, boil, top, and bake
This recipe is designed for home bakers who want a classic bagel texture without using a long, overly complicated method. The dough should feel firm, the boil should be brief, and the bake should finish at high heat for even browning and better structure.
How to Make Bagels at Home
Making bagels at home is simple once you know the key texture cues. The dough should feel firm, the rings should hold their shape, and the boil before baking helps create the classic chewy crust.
1. Proof the Yeast
In ½ cup (120 ml) warm water, stir in the sugar and yeast. Let it sit for 5 minutes, then stir until dissolved. The mixture should look lightly foamy.
2. Mix the Dough
In a large bowl, combine the bread flour and salt. Add the yeast mixture and ⅓ cup (80 ml) warm water, then mix in more water gradually as needed. The dough should come together moist but firm.
3. Knead Until Smooth
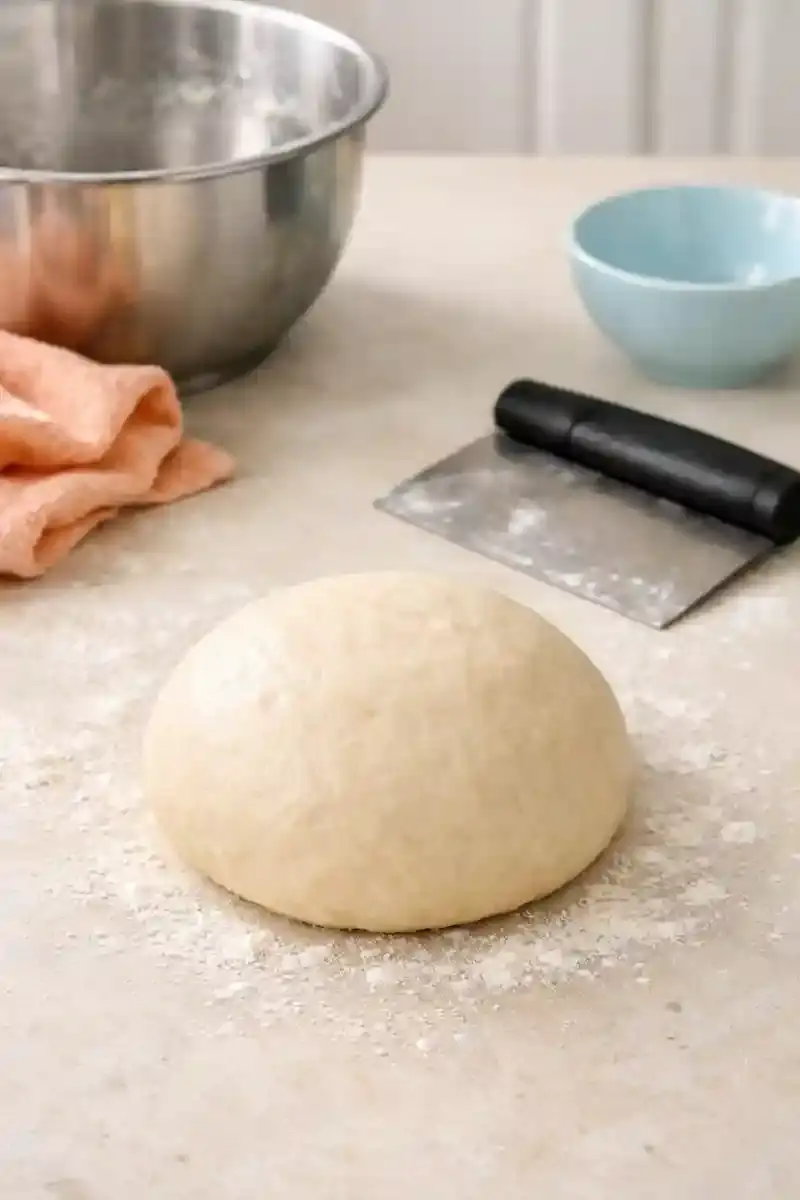
Transfer the dough to a lightly floured surface and knead for about 10 minutes. It should become smooth, elastic, and firm. This helps build the chewy bagel texture.
4. Let the Dough Rise
Place the dough in a lightly oiled bowl and turn it once to coat. Cover with a damp towel and let it rise for about 1 hour, or until doubled in size.
5. Divide and Shape
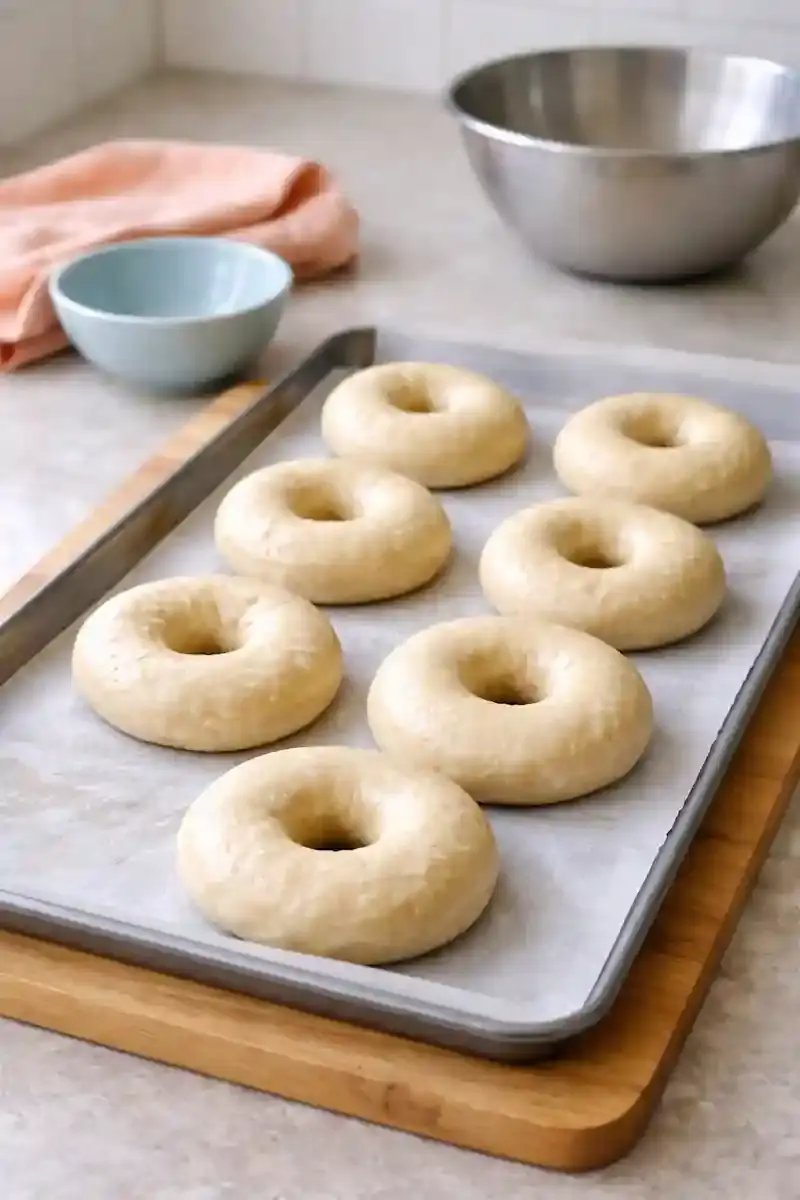
Punch the dough down and let it rest for 10 minutes. Divide it into 8 equal pieces, shape each into a ball, then poke a hole through the center and gently stretch into a ring.
6. Rest the Shaped Bagels
Place the shaped bagels on a greased or parchment-lined baking sheet. Cover lightly with a damp towel and let them rest for 10 minutes while the oven heats.
7. Boil the Bagels
Preheat the oven to 425°F (220°C) and bring a large pot of water to a boil. Boil the bagels in batches for 1 minute per side for a softer texture or 2 minutes per side for more chew.
8. Add Toppings
Lift the bagels out with a slotted spoon and return them to the baking sheet. Add toppings right away so they stick well.
9. Bake Until Golden
Bake for 20 to 25 minutes, until deep golden brown. Cool on a wire rack before slicing or serving.
Why Are Bagels Boiled Before Baking?
Bagels are boiled before baking because that step helps create their signature texture. The hot water sets the outer layer of the dough, which leads to a shinier crust and a denser, chewier interior once the bagels bake.
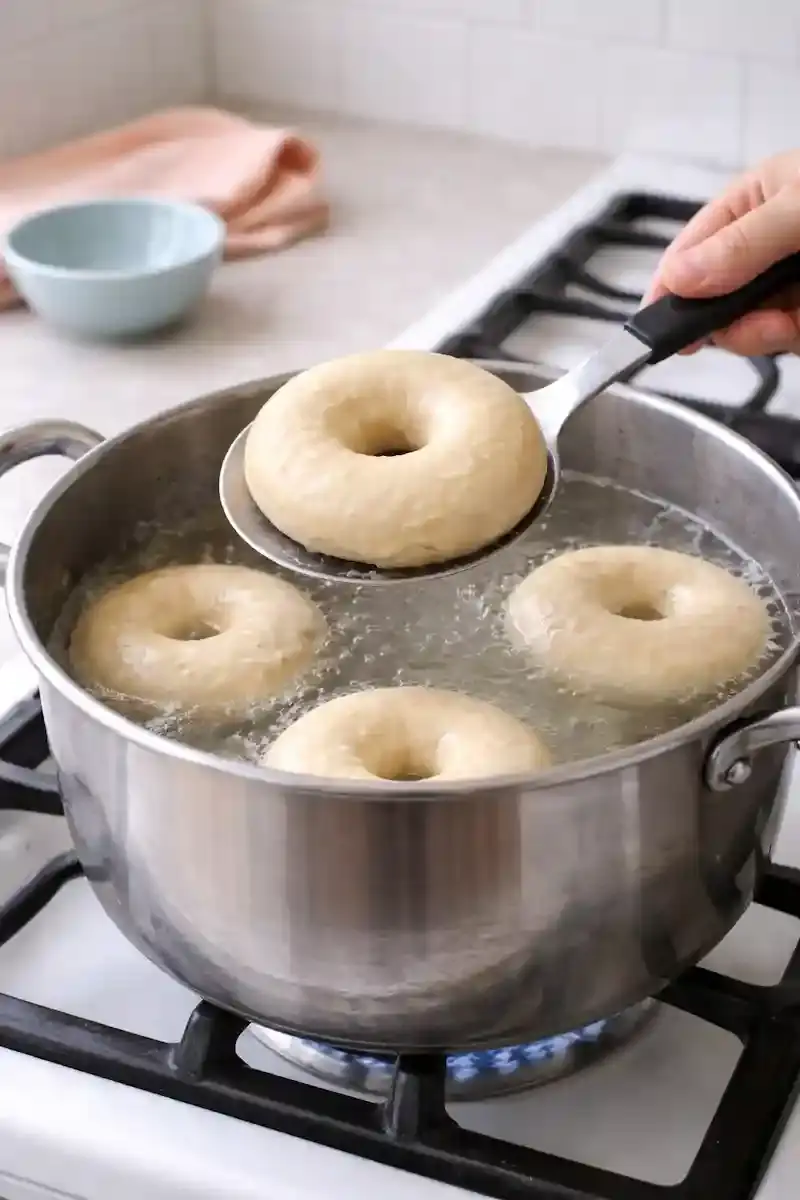
Boiling also helps bagels keep their shape in the oven. Without that step, they tend to bake more like bread rolls, with a softer crust and a lighter texture instead of the classic bagel bite.
The length of the boil matters too. A shorter boil gives a slightly softer result, while a longer boil produces a firmer, chewier bagel.
How Long Should You Boil Bagels?
Boiling time affects the final texture of your bagels. A shorter boil gives a slightly softer crust and a lighter chew, while a longer boil creates a denser bagel with a firmer bite.
For this recipe, boiling each bagel for 1 minute per side is a good choice if you want a balanced texture. If you prefer a more traditional chewy bagel, boil for 2 minutes per side instead.
A steady boil works better than an aggressive rolling boil because it helps the bagels keep their shape. Once boiled, move them back to the baking sheet, add toppings right away, and bake while the surface is still slightly damp so the toppings stick more easily.
You can use boil time to adjust the final texture of your bagels. A shorter boil gives a lighter result, while a longer boil creates a denser, chewier bagel with a thicker crust.
| Boil Time | Texture | Crust | Best For |
|---|---|---|---|
| 30 seconds per side | Lighter texture | Thinner crust | A softer homemade bagel |
| 1 minute per side | Balanced chew | Classic crust | An all-around bagel texture |
| 2 minutes per side | Denser, chewier texture | Thicker crust | A more traditional bagel bite |
Best Toppings for Homemade Bagels
Classic toppings work especially well on homemade bagels because they add flavor without changing the dough itself. Sesame seeds, poppy seeds, everything seasoning, and dried onion are all simple options that pair well with the chewy texture of this recipe.
For the best hold, add toppings right after boiling while the surface is still damp. You can also brush the bagels lightly with egg wash if you want the toppings to stick more firmly and bake up with a slightly shinier finish.
A few reliable options include:
- Sesame seeds for a nutty, classic finish
- Poppy seeds for light crunch and mild flavor
- Everything seasoning for a savory mix
- Dried onion flakes for deeper flavor
- Plain if you want a simple bagel for sweet or savory spreads
Tips for Chewy Texture and Even Browning
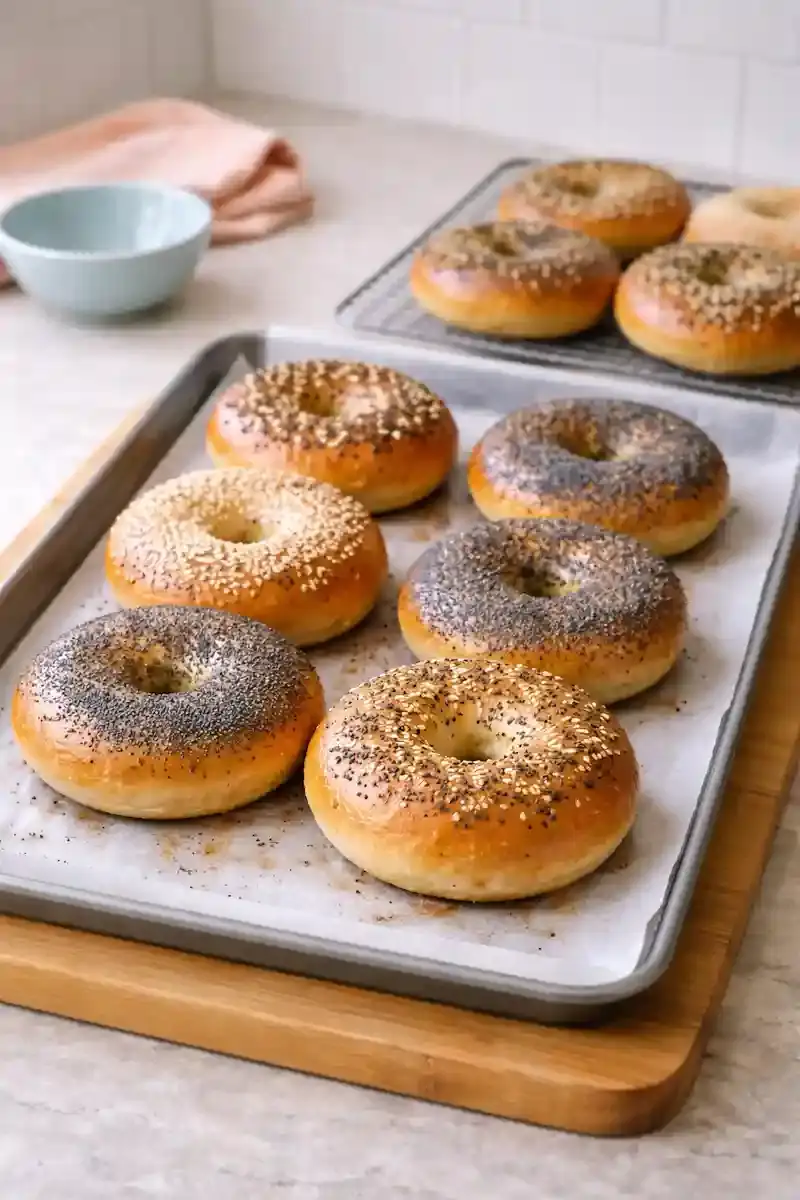
A chewy bagel starts with a firm dough and the right flour. Bread flour gives a strong structure, and high-gluten flour can make the texture even firmer. If the dough feels too soft, the bagels may bake up more like bread than classic bagels.
Boiling time also affects texture. A shorter boil gives a softer bite, while a longer boil creates more chew. For even browning, bake the bagels in a fully preheated 425°F oven and leave enough space between them on the baking sheet so hot air can circulate well.
A few simple tips help:
- Knead until the dough feels smooth and elastic
- Keep the dough firm, not loose
- Make the center hole large enough so it stays open
- Add toppings right after boiling
- Bake until the bagels are deep golden brown
Recipe Testing Notes
- A firm dough helps bagels keep their shape and bake with a chewier texture.
- A 1-minute boil per side gives a lighter result, while 2 minutes per side creates more chew and a thicker crust.
- Make the center hole slightly larger than needed so it stays open after proofing, boiling, and baking.
- Use a slotted spoon to lift the bagels gently from the water without pressing them down.
- Add toppings while the surface is still damp and bake until the bagels are deep golden brown.
Variations and Simple Substitutions
This bagel recipe is easy to adjust without changing the basic method. The simplest way to vary it is through flour choice, toppings, and how you serve the finished bagels.
- Use high-gluten flour for a firmer, chewier bagel with a more traditional bite.
- Use all-purpose flour only if needed, knowing the texture will be softer and less chewy.
- Keep them plain if you want a flexible base for sweet or savory toppings.
- Add sesame seeds, poppy seeds, everything seasoning, or dried onion right after boiling for different finishes.
- Brush with egg wash before topping if you want better adhesion and a shinier crust.
Plain bagels work well with cream cheese, eggs, smoked salmon, nut butter, or jam, which makes them easy to use for breakfast, brunch, or simple make-ahead meals.
Troubleshooting Bagels
Bagel problems usually come down to dough texture, shaping, boiling time, or oven heat rather than the ingredient list itself.
- Bagels browned unevenly: Make sure the oven is fully preheated and leave enough space on the baking sheet for even airflow.
- Bagels turned out too soft: The dough may have been too wet, the flour may have been too low in protein, or the boil may have been too short. Use bread flour and keep the dough firm.
- Bagels are too dense: A very stiff dough, underproofing, or too much flour during kneading can make the texture heavy. The dough should feel firm, but it should still rise well.
- Bagels went flat after boiling: They may have been overproofed or shaped with a hole that was too small. Shape them firmly and make the center hole slightly larger so it stays open.
- Bagels taste more like bread rolls: This usually happens when the dough is too soft or the boil is skipped or shortened too much.
How to Store, Freeze, and Reheat Bagels
Homemade bagels are best the day they are baked, but they store well for later. Once fully cooled, keep them in an airtight container at room temperature for up to 2 days so the crust does not soften too quickly.
For longer storage, freeze the bagels in a sealed bag or container. You can freeze them whole or sliced, which makes reheating easier for busy mornings. Toast or warm them straight from the freezer, or let them thaw at room temperature first. For more general freezing guidance, the USDA Freezing and Food Safety resource is a helpful reference.
To reheat, toast sliced bagels for a firmer crust or warm whole bagels briefly in the oven for a softer finish. This makes the recipe practical for breakfast, brunch, or make-ahead baking.
Safety Notes
Use warm water for the yeast, not hot water. If the water is too hot, it can weaken or kill the yeast and affect the rise. A warm range around 105°F to 110°F works well for active dry yeast, and this University of Illinois Extension – Active Dry Yeast Guide explains the temperature range in more detail.
Take care when boiling the bagels, since hot water can splash when you lower them into the pot or turn them. Use a slotted spoon and avoid crowding the pot so you can move each bagel safely.
Let the bagels cool for a few minutes before slicing. The crust firms up as they rest, and cutting them too early can make the interior feel slightly gummy.
PrintHomemade Bagel Recipe
This homemade bagel recipe makes classic bagels with a chewy interior, a lightly crisp crust, and a deep golden finish. Using bread flour or high-gluten flour and a boil-before-bake method helps create a more traditional bagel texture at home.
- Prep Time: 20 minutes (plus 1 hour rise)
- Cook Time: 25 minutes
- Total Time: 1 hour 45 minutes
- Yield: 8 bagels 1x
- Category: Bread / Breakfast
- Method: Boiled + Baked
- Cuisine: American / Jewish (New York-style)
- Diet: Vegetarian
Ingredients
- 2 teaspoons (6 g) active dry yeast
- 4 1/2 teaspoons (19 g) granulated sugar
- 1 1/4 cups (300 ml) warm water, plus up to 1/4 cup (60 ml) more if needed
- 3 1/2 cups (440 g) bread flour or high-gluten flour, plus up to 1/2 cup (60 g) for kneading
- 1 1/2 teaspoons (6 g) salt
- Optional toppings: sesame seeds, poppy seeds, everything seasoning, dried onion flakes
Instructions
- In 1/2 cup (120 ml) warm water, add the sugar and yeast. Let sit for 5 minutes, then stir until dissolved.
- In a large bowl, combine the flour and salt. Make a well in the center and pour in the yeast mixture.
- Add 1/3 cup (80 ml) warm water, then gradually mix in more water until the dough is moist but firm. Adjust with extra water if needed.
- Transfer to a floured surface and knead for 10 minutes, until smooth, elastic, and firm.
- Place the dough in a lightly oiled bowl, turn to coat, cover with a damp towel, and let rise for 1 hour, until doubled.
- Punch down the dough, rest for 10 minutes, then divide into 8 equal pieces and shape into smooth balls.
- Poke a hole in the center of each ball and gently stretch into bagel shapes, making the hole slightly larger than needed so it stays open.
- Place the shaped bagels on a greased baking sheet, cover with a damp towel, and rest for 10 minutes while the oven preheats to 425°F (220°C).
- Bring a large pot of water to a boil and boil the bagels in batches for 1 minute per side for a slightly softer texture or 2 minutes per side for a chewier bagel.
- Remove the bagels with a slotted spoon and add toppings immediately while the surface is still damp, or brush with egg wash if desired.
- Place the boiled bagels on a parchment-lined baking sheet and bake for 20 to 25 minutes, until deep golden brown.
- Cool on a wire rack, then serve warm or slice and toast with your favorite spreads.
Notes
- Bread flour gives bagels a chewy texture, while high-gluten flour creates an even firmer, more traditional bite.
- For more chew, boil the bagels 2 minutes per side instead of 1 minute per side.
- The dough should feel firm rather than soft, which helps create the classic bagel texture.
- Make the center hole slightly larger than needed, since it will shrink during boiling and baking.
- Add toppings right after boiling so they stick more easily.
- Freeze cooled bagels whole or sliced for easier reheating later.
Nutrition
- Serving Size: 1 bagel (≈120 g)
- Calories: 280 kcal
- Sugar: 3 g
- Sodium: 430 mg
- Fat: 1.5 g
- Saturated Fat: 0.3 g
- Unsaturated Fat: 1.0 g
- Trans Fat: 0 g
- Carbohydrates: 57 g
- Fiber: 2 g
- Protein: 10 g
- Cholesterol: 0 mg
Bagel Recipe FAQs
Yes, but the bagels will usually be softer and less chewy than bagels made with bread flour or high-gluten flour. Bread flour is the better choice if you want a more classic bagel texture.
A chewy bagel comes from a firm dough, higher-protein flour, and boiling before baking. Those three factors help create the dense crumb and classic crust bagels are known for.
Boil bagels for 1 minute per side if you want a slightly lighter texture, or 2 minutes per side if you want a denser, chewier result. The longer boil creates a firmer crust and more classic bagel bite.
Make the center hole slightly larger than it looks at first, because it will shrink as the dough rises, boils, and bakes. This helps the finished bagels keep their classic shape.
Yes, homemade bagels freeze well once fully cooled. Freeze them whole or sliced in a sealed bag or container, then toast or warm them when ready to serve.
Related Recipes
If you enjoy practical homemade recipes, you may also like browsing these related pages on To Learn Recipes:
- Low-Calorie Recipes for more everyday meal ideas
- Bang Bang Sauce Recipe for a flavorful homemade sauce option
- Homemade Sauces Guide for more simple sauce ideas to pair with meals and snacks
Conclusion
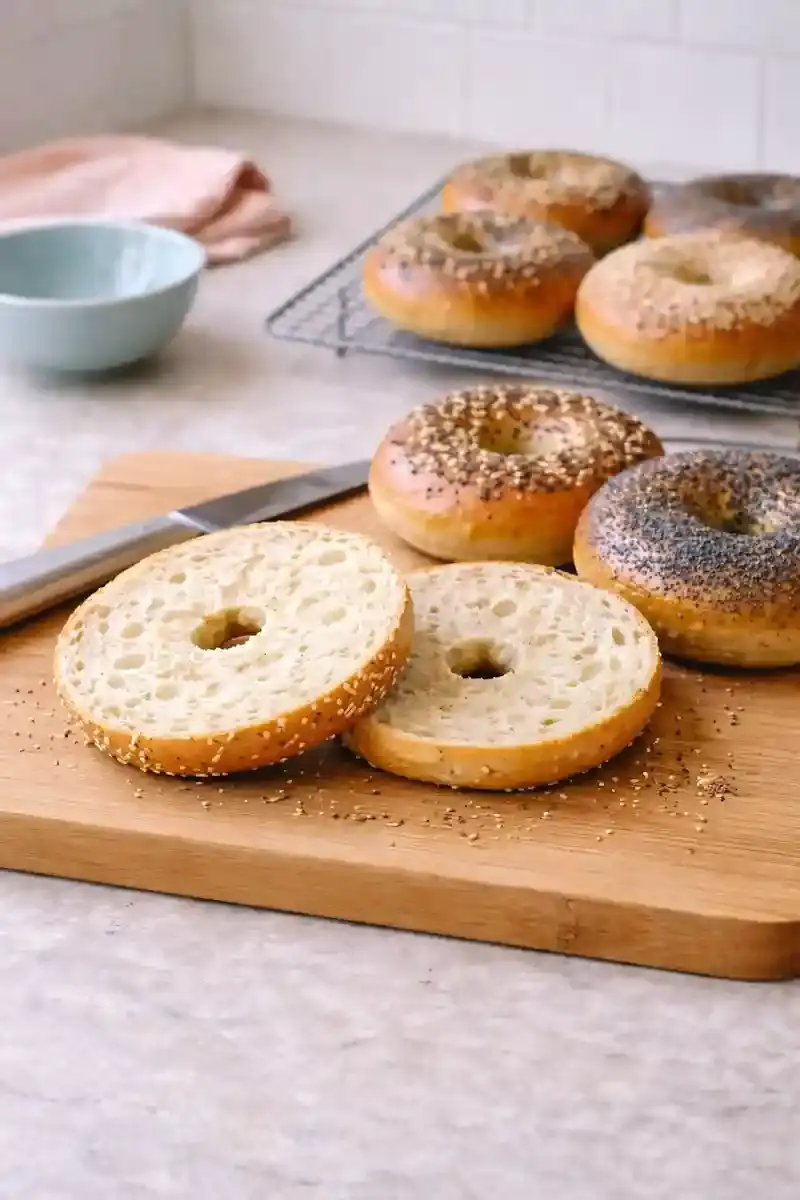
This bagel recipe keeps the process simple while still giving you the chewy texture, golden crust, and classic shape people expect from homemade bagels. With the right flour, a firm dough, and a short boil before baking, you can get a reliable bakery-style result in a regular home kitchen.
It is also an easy recipe to repeat once you understand the core steps. From flour choice and boiling time to toppings and storage, a few small technique details make a clear difference in the final texture and finish.

